Water Heater Repair Basics
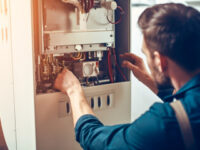
If your water heater isn’t producing any hot water, one of the elements may be bad. To check this, you can switch off the power to the unit in your service panel and remove the access panel and insulation.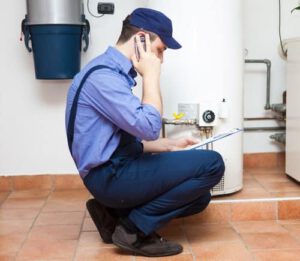
Expert plumbers will use quality parts to make perfect repairs that last long. They will also provide advice on maintenance to prevent future problems. For professional help, call Denver Water Heater Repair now!
The anode rod is a crucial part of your water heater that sacrifices itself to keep the tank from corroding. It is often referred to as a “sacrificial anode.” Without it, sediment and other corrosive elements that would normally eat through the water heater’s tank lining will instead collect on the anode rod and protect the tank from rusting out. This is why replacing the anode rod periodically is important, typically every three years.
The first step in replacing an anode rod is to open the drain valve and turn on a faucet to relieve pressure in the tank. Next, drain about two gallons of water from the tank using a garden hose. Once the tank is drained, locate the anode rod position, which should be on top of the water heater or underneath one of the plastic caps on older models. There may be insulation on the anode rod head, so you’ll want to remove this to expose the head and the hex nut that secures it.
With a socket wrench or pipe wrench, loosen the anode rod and lift it out of the water heater. Be careful, the rod is likely hot and could still be leaking. You may need to use a cheater bar or length of pipe to increase leverage. When removing the anode rod, avoid banging on it or the tank as this can crack the glass lining.
Once the anode rod is removed, locate a new replacement and screw it in place by turning it clockwise with your socket wrench. Be sure to use a magnesium anode rod, as these are superior to aluminum types and do a much better job at protecting your tank from corrosion.
The anode rod is a critical safety device that is designed to fail, but you’ll need to regularly inspect it for signs of deterioration. Usually, this will be obvious by looking for dark spots or areas of rust on the rod. If it’s deteriorating, or you find that you can no longer easily remove it from the tank, then call us for a professional anode rod replacement and inspection.
Dip Tube
Dip tubes are a key component to a working water heater. They bring cold incoming water from the home plumbing into the tank near the bottom and help maintain correct convection of the water. They are made of non-metallic, heat resistant plastics so that they do not interfere with the sacrificial anode rod or cause electrolytic corrosion of the water heater. A faulty dip tube will not allow the proper convection cycle to work and can result in a lukewarm shower or very little hot water at all. In addition to the loss of hot water, a broken or disintegrating dip tube can leave small pieces of plastic in hot-water faucet strainers and shower heads.
The first thing to do when replacing a dip tube is to turn off the power supply to the water heater. Next drain a few gallons of water from the tank using a garden hose connected to the water heater’s open drain valve and a shut-off valve installed at the nearest hot water faucet.
While draining, it is a good idea to disconnect the water heater’s cold water pipe nipple and connector at the top of the tank. This can be done by loosening the nipple and turning it counterclockwise with a wrench. This will reveal a hole on the top of the tank. Remove the old dip tube by inserting a screwdriver in the opening and pulling outwards. Then, drop a new tube into the hole, ensuring it is the right length (the dip tube should extend slightly below the inlet port nipple). Secure the tube to the tank with plumber’s tape.
There are a few different types of dip tubes. One is a standard flanged style that requires a flat screwdriver to access the inlet nipple, while others have a flared upper end. In either case the replacement should be cut to size and, if not already installed, fastened in place with the inlet nipple. Finally, wrap the end of the replacement with plumber’s tape to seal off any leaks or cracks. Once the new tube is in, restore the nipple and cold water pipe and restore the power and water to the heater.
Thermocouple
A tiny metal cylinder (also called a flame sensor or thermocouple) located within the burner section of your gas water heater, the Thermocouple is a safety device that senses whether or not the pilot light is lit. If it isn’t, the Thermocouple will send a signal to the gas control valve to remain closed until the pilot is relit.
The Thermocouple is made from two different metals – one made of iron (Fe), and the other is constantan (an alloy of copper and nickel, CuNi). When these metals are combined together, they create an electric voltage potential that can be measured with a multimeter. When the Thermocouple is contaminated with carbon or oxidized, or breaks, it will no longer be able to detect the pilot flame and will cease to function.
In most cases, a new Thermocouple will resolve the problem. To do this, you’ll need to shut off the gas supply and remove the burner assembly manifold cover plate. Depending on the brand and model of your water heater, this panel may be secured by nuts or screws, or with specialty tamper-resistant fasteners. Once the panel is removed, gently lift the manifold/burner assembly from the combustion chamber and set it aside.
Once you have the old thermocouple out, use a tape measure to determine the length of your new one and purchase one in that size from your local home improvement or hardware store. It’s important to make sure your Thermocouple is the right size for your water heater to ensure proper installation.
Once you have your new Thermocouple installed, you’ll need to relight the pilot and test it again. If your water heater has a manual “ignite” button, press it to light the pilot. Otherwise, open the gas regulator valve and use a long utility lighter to bring it to a glowing state. Once the pilot is lit, close the gas regulator valve and turn the water heater back on. It will take a few minutes for the hot water to start flowing. Be sure to test the temperature and pressure of your water when it’s done.
Pressure Valve
The pressure-relief valve on a water heater helps protect the tank against a buildup of excessive heat and pressure. If it fails to operate properly, the water tank can burst, flooding your home and causing costly damage. To prevent this, it’s a good idea to test your valve periodically. A qualified plumber can do this for you, or you can test it yourself.
To test the pressure-relief valve, shut off the power to your water heater and flip the gas breaker for the tank. Then connect a hose to the drain valve at the bottom of the tank and direct it to a bucket. Shut off the dialers on the heater that stand for cold water and gas, and then open the valve slowly and partially. A small trickle of water should flow out of the discharge tube, and a hissing sound will be heard from the valve. This indicates that the valve is working as intended. If the valve opens fully and water pours out of the tube, it is overflowing and should be replaced immediately.
When the valve is closed, hydraulic force pushes area A of the spool up against spring force in area B to close it. When outlet pressure reaches the pressure setting of the valve, the spool opens fully and the relief is accomplished by flowing water through the opening to the tank. As the valve bleeds off water, hydraulic pressure builds back up in area A and the spool opens partially, continuing the cycle.
Water from the tank flows through the relief valve into the overflow pipe, which runs down the side of the heater. Often this pipe is soldered or glued into place, and may need to be cut off to remove the valve. If you plan to reinstall the drain pipe, be sure to use piping that is rated for hot water (such as CPVC), and wrap Teflon tape around the threads of the new valve before screwing it into place. Also, remember to reorient the overflow pipe opening away from the heater when reinstalling the valve.